|
|
|
|
|
Using a PS1
Exploit via ARMax (non Evo) to install FMCB
Written by pepsi_max2k
Synopsis: For those of you who have a Fat PS2 {wont work for Slimline consoles} you can install Free McBoot with an old AR max disc that supported USB game save transfers, but doesnt have the MaxMedia Player. If you have a AR Max Evo disc there's specific guides elsewhere for this and I suggest you use those - Click the "Installation Tab" above And to anyone reading this for the first time (ubernoob like me...) - to softmod any PS2 with no other modded PS2s around, you NEED an AR, Codebreaker or other type of disc to at the very least transfer files from a USB stick to mem card, or run exploit direct from USB. Think of the AR type discs as equivalent to Splinter Cell / Mech Assault / 007 discs on the xbox; you can't do it without them. So no fancy USB only methods like I was hoping for ...... Although you can use a previously modded box to install FMCB on a mem card and use it on your console, but if you're 'billy no-mates' then carry on reading... References Here are some links related to the PS1 Exploit and other tutorials on homebrew applications. http://ubergeek.awardspace.com/ http://ashholt.googlepages.com/ps2softmod http://sksapps.com/tutorials http://www.aoinamida.com/fmcbesr/esrdvdplayer.html Ok, on with the tutorial...... Hardware needed:
Software Needed:
Process: Create The Exploit Basically you need 1 single file on a USB stick (step 3.1 below), and to transfer this to a mem card. This exploit file is 'masked' as a game save file for the Memory Card's {MC} Your System Configuration save file you see on your MC. Once this file is on your MC it requires a PS1 Game to 'trigger' the exploit to run, instead of the PS1 Game by reading a special file called the TITLE.DB. So lets start with grabbing a PS1 game disc and create the TITLE.DB file. First create a folder on your PC where we can put all the files we are going to use in, example: Exploit Files Prepare files TITLE.DB -- Stick the PS1 game in your PC. Open My Computer and look at the disc title, or open the disc and look for a title like "SCES_019.79", "SLES_000.00", "SCUS_000.00" etc etc. This is the game's ID - remember it. Option 1 -- You can use this Online TITLE.DB maker  Save the file to the Exploit Files folder on your PC. Option 2 -- Run TitleDB Generator, click the "get ID from CD button , click "Add", then click the "Save TITLE.DB" button. The TITLE.DB file will save in the same directory TitleDB Generator is run from. Now right click the title DB file, click Open With..., select program from list, choose Notepad, and ensure the contents of the file reads like so...  ...where SLUS_000.42 is the ID you entered from the PS1 game. Make sure it is in this format, but might not be the same letter and numbers. The underscore { _ } and period { . } are important to be as you see it in the above image. Alternatively you can get the letters and numbers right off the disc and case side. BOOT.ELF -- In the uLaunchELF folder there's a file called BOOT.ELF, it is the only file you need from the download. Create Exploit Save -- Now run ps2save-builder.exe. Press the New File button so that an icon.sys and my.icn entry appear in the list. If you do not do this you will see Corrupted Data messages when using AR and it wont work.............So do it!  -- Drag the TITLE.DB file from the folder into the list in PS2 Save Builder. Also drag the BOOT.ELF file from uLaunchELF in to the same list. The list should look like the below image. Note upper casing and exact naming IS important. File size is not so important, these will change depending on released versions of software. Note: Some versions will not accept the folder name of "NEW_FILE", so change it to your region by naming it accordingly: BADATA-SYSTEM - for NTSC - U/C BEDATA-SYSTEM - for PAL BIDATA-SYSTEM - for NTSC - J I will still refer to this in the rest of the guide as NEW_FILE, so you will know its the same one im refering to.  -- Click File > Save As in PS2 Save Builder. Choose AR MAX V3 (*.max) from the Save As Type field, and type "Exploit_Save" as the name (shouldn't matter what name you use, but it works for me).  -- Now transfer this file to the root of your USB drive (eg: I:\Exploit_Save.max). Right-click the Exploit_Save.max and "send to" your USB device in the list that appears.  NOTE: You can also "send" the INSTALL folder and the FREE_MCBOOT.ELF to your USB device now, as we will be using it later in the tutorial.
Transfer exploit to mem card. -- Stick USB stick and Mem Card in to the PS2. Load AR disc. -- Once AR loads, open Max Memory section, then My Devices, then select your Mem Card (1 or 2). 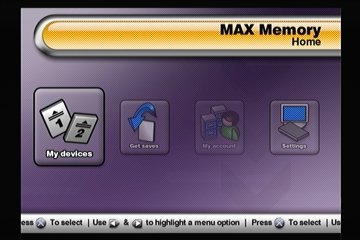 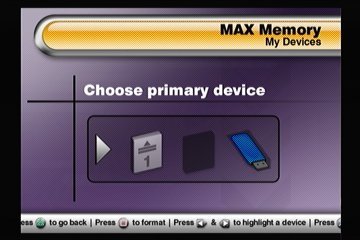 -- Highlight the Your System Configuration entry and press X to select it, then move right and down to select delete and confirm it. 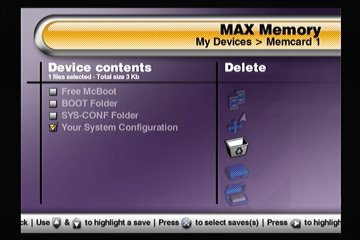 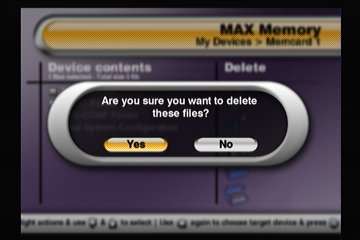 -- Now hit triangle to move back a screen, select the USB stick, and if you remembered to add my.icn and icon.sys you should see an entry called NEW_FILE and not Corrupted Data. Depending on how much other stuff you have on your USB stick it could take a few minutes to show anything in the list so just wait for it. 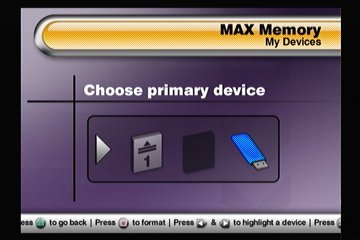 -- Highlight and hit X to select NEW_FILE, move right and down to Uncrush and right to select your memory card (1 or 2). Hit X and confirm. 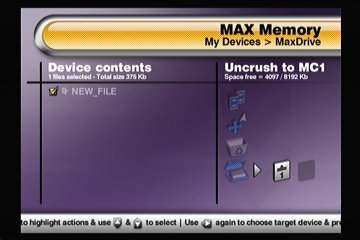 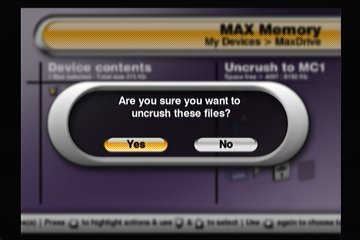 -- You will see the file now writing to the MC 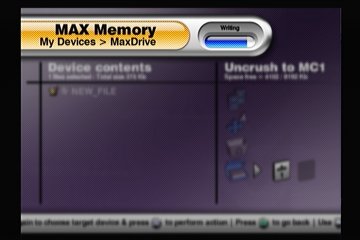 -- Now navigate back a screen, select your mem card again and check to see that NEW_FILE is listed. If so, you can remove the AR disc and USB stick. Run Exploit. -- Insert your PS1 game, reboot if necessary, and once the game starts loading you should see a quick white flash and then see the uLaunchELF screen. 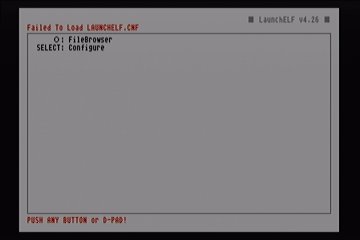 IMPORTANT: If you did not copy your INSTALL folder and FREE_MCBOOT.ELF to USB device, you must do it now before continuing!
-- Ensure the USB stick is connected. Press O button for the FileBrowser in the uLaunchELF screen, move down to mass:/ and hit O, then move down to select FREE_MCBOOT.ELF and hit O to run it. 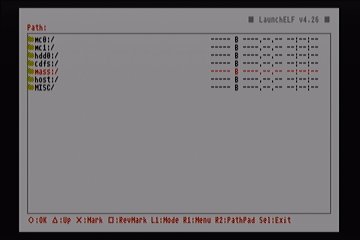 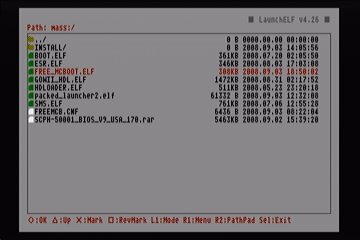 Next the installer should load..... 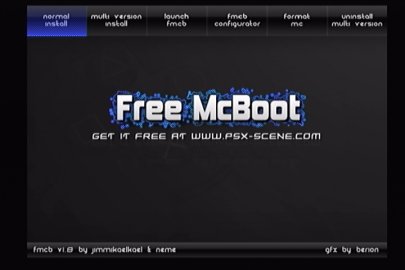 -- Read the Free McBoot Advanced User Guide if you need help deciding on what to do next. |