

|
|
FMCB Configurator Guide
Written
by JNABK
 There are 2 ways you can configure Free
McBoot, using the
Configurator in the PS2 after the installation or manually
create a CNF
file on your PC and
include it in
the installation's FMCB_CFG folder.
Using FMCB Configurator Once the Installer has successfully installed, you can go right to the configurator app by selecting the fmcb configurator from the top menu. You will first see an option for button layout, meaning what button do you prefer to be the OK and Cancel buttons, so press the one you would rather use. At the bottom of each screen is a key legend of what buttons to press for specific options per screen. 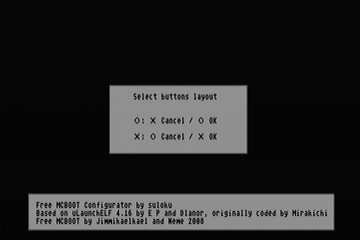 Next the main menu appears..... Default
example:
The FREEMCB.CNF is
loaded from mc0: by
default , unless a FREEMCB.CNF is present on the root of an attached
USB device.
Load
CNF from MC0
Default
example:
Here you can assign
apps from a path to
load with a button press, Configure
E1 launch keys...
is the first location
the launcher will look in for an app to load, if not found,
it will go to the next set of paths for that button in Configure E2 launch keys... as
the second location set,
then on to Configure E3 launch
keys.... as the third
location set. If still no files are found in any of those
locations for that button press, it will by default load the OSD,
unless you have changed it from default.
At the bottom key legend you see [] : Map to any MC Pressing Square will set the path to mc?:/ mapping to both MCs in either slot. So you can set 2 different folders on a MC and still put the MC in either slot and FMCB will search both locations. Example:
mc?:/BOOT/BOOT.ELF
mc?:/BADATA-SYSTEM/BOOT.ELF This will make fmcb search both folders in both MC slots, giving you 4 paths to be searched from just 2 entries. Recommended apps are pre-configured as default settings as shown in the example image above. This is very useful if MC space is important to save, you can assign all your apps in the Configure E1 launch keys... to mass:/ {USB stick} and then assign Configure E2 launch keys... to look on the same MC or on a second MC by using mc?:/ FOLDER/FILE.ELF. This makes it very flexible when using a number of MCs and/or USB sticks. Most people will only need to configure Configure E1 launch keys..., but for the advanced user this is a very useful method when using multiple sets of devices.
-OSD Settings menu: 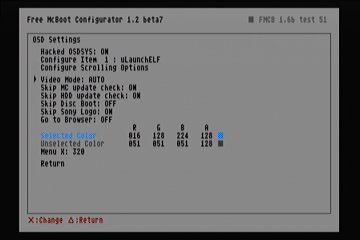
--Hacked
OSDSYS ON - Default setting
Displays list of apps in
Sony main menu to be selected for
booting
OFF - Disables the OSD Hack
--Configure
Item :
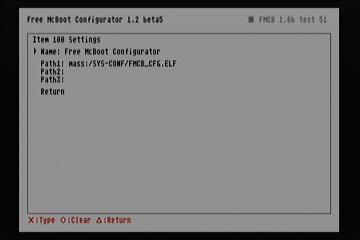
Press left or right to select an item from 1 to 100 ---Name: Displays in the OSD Menu {Sony Main screen} ---Path1: First location searched for by FMCB ---Path2: Second location searched for by FMCB ---Path3: Third location searched for by FMCB Here you can assign apps and give them a name that will display on the Sony main menu screen. You can select up to 100 apps and they will be linked to the Sony menu. Pressing L2 will allow you to copy the selected Item and you can paste {press R2} it into another Item number by pressing < | >, if you wish to re-arange them for your OSD menu. This way you dont need to input everything all over. A small pop-up window appears when you press R2 to Paste showing the info your about to change and asks for a confirmation. Press Cancel or OK button. The 3 sets of paths will be the search order the launcher will follow when booting the selected app from the list. The recommended apps are already pre-assigned and named. Default
example:
 ---Configure
Scrolling options
---Scroll Menu :
ON Default
setting turns on the scrolling effects
OFF disables scrolling effects ---Displayed Items : 7 Default setting 4 to 10 items can be selected ---Menu y : 110 Default setting - centered in the screen The range is 0 to 220 You can adjust the entire list up { lower number } or down { higher number }. But use caution or the top might be cut off if your Displayed Items is set to a high number, as shown in the up & down example images. Example settings:
Menu y : 0 {too high} Menu y : 110 {centered} Menu y : 220 {too low} 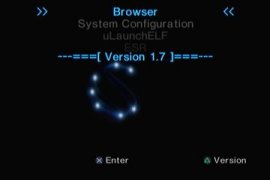
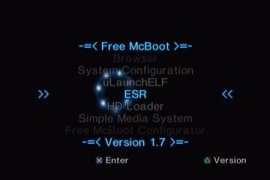
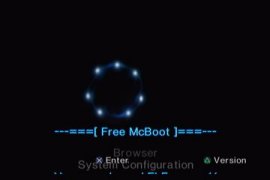 You can save and go to the PS2Browser ( FMCB restart) and see the results, then return to the configurator if you need to make more changes. ---Cursor Max Velocity
: 1000 Changes the distance the cursor indicator moves
across the
screen
---Cursor Acceleration : 100 Changes the speed the cursor indicator moves ---Left Cursor: o009 10 char. max. ---Right Cursor: o008 10 char. max. ---Top Delimiter: y-99Free McBoot c1[ r0.80Version 1.8 r0.00] y-00 80 char. max. ---Bottom Delimiter: c0 r0.60 y+99Use o006/ o007 to browse list y-00 r0.00 80 char. max. --Video Mode: AUTO,
PAL, NTSC {AUTO is
default setting }
- -Skip MC update check: ON -Default setting
Controls DVD Player Update check from mc
--Skip HDDupdate check: OFF - Does normal searches for updates ON -Default setting
Stops PS2 OSDSYS from
searching for update files on the HDD.
{HDD doesnt power up}
--Skip Disc Boot: OFF - Powers on HDD and searches, then powers down HDD ON -Default setting
Prevent a disc (if inserted on
power-on/reset) to boot through OSD.
--Skip Sony Logo:OFF - disables option. ON -Default setting Skips the "Sony Computer Entertainment"-Logo , helps speed up boot process. OFF - Disables option - -Go to Browser: ON - Free McBoot loads to MC browser menu OFF - Default setting Free McBoot loads to Sony main menu --Selected Color - changes the color of the selected item in Sony's main menu --Unselected color - changes the color of the unselected item in Sony's main menu
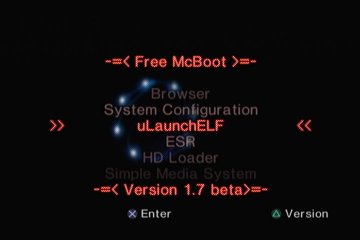 --MenuX
: 320 Default setting
- centered in the screen
Range is 0-640. You can adjust the entire list to the left { lower number }or the right { higher number }. But use caution or the words might be cut off, as shown in the left & right example images. So adjust in small amounts at a time. You can save and go to the PS2Browser ( FMCB restart) and see the results, then return to the configurator if you need to make more changes. Example settings:
MenuX : 0 {too far left} MenuX : 320 {centered} MenuX : 640 {too far right} 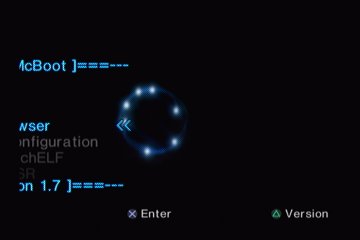  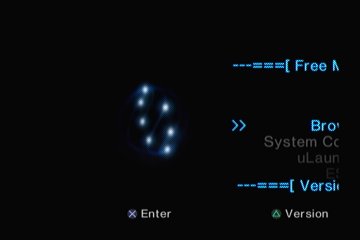 --Enter
X: 030
Y: -01 Default setting
--Version X: -01 Y: -01 Default setting Settings range X = left{000} to right {640} Y = top {000} to bottom {256}
X: 000 to 520
Y: 000 to 210 {NTSC}
X: 000 to 520
Y: 000 to 242
{PAL}
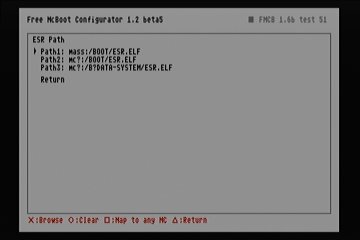
The above are the setting limits before going off the screen. So use caution when making your changes, experiment for best results. You can save and go to the PS2Browser ( FMCB restart) and see the results, then return to the configurator if you need to make more changes. Examples: Enter is set to - X: 525 Y: 000 and Version is set to - X: 520 Y: 210 Enter is set to - X: 000 Y: 000 and Version is set to - X: 000 Y: 210 Configure ESR Path...
You can assign the locations you want
Free McBoot to search for direct ESR launch.
Default
example:
 FastBoot: ON - Fastboots a disc if found
Debug screen:OFF -Default setting Disables option ON - Displays a green screen when it doesn't
find any ELF to launch
Pad
Delay: OFF -Default setting It launches the PS2 OSD when no ELF found 0.0 Default setting
Save CNF to
MC0Saves changes to mc0:/SYS-CONF/FREEMCB.CNF
Save CNF to
MC1Saves changes to mc1:/SYS-CONF/FREEMCB.CNF
Save CNF to
MassSaves changes to mass:/FREEMCB.CNF
Return to Loader Boots the BOOT.ELF { Searches for mc?:/BOOT/BOOT.ELF, then
B?DATA-SYSTEM/BOOT.ELF (first pal,
then usa, finally jap)
PS2Browser
(FMCB restart}Boots to PS2Browser and restarts Free
McBoot {unless MC has been
removed}
Places to find
help:
|