|
|
|
|
|
Install Free McBoot from a CD
Written by JNABK
You need:CDGenPS2 3.0 Free McBoot or Noobie Package A blank CDR and a burner A method to boot the CD Creating the CD: Extract the folder from the CDGenPS2v3.rar and place it on your desktop {or any place you can find it easily}. Extract the folder INSTALL and the FREE_MCBOOT.ELF into the CDGenPS2v3 folder. NOTE: Please read the User Guide and prepare your installation files before continuing on with the CD compilation, its important to do this FIRST ! If using the Noobie package, all files are already prepared for installing. 1-First we need to create a .CNF using Notepad. Open a new text document and copy/paste the following into it, making sure to copy the empty space of line 4 too.
Name this SYSTEM.CNF and select All files from Save as type: and save it in the CDGenPS2v3 folder . 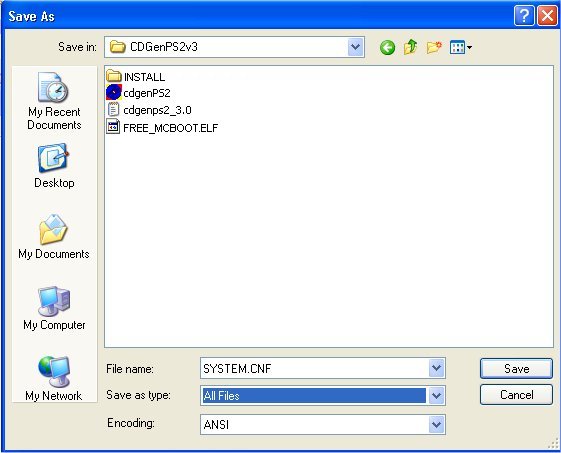 2-Next open CDGenPS2 and drag the SYSTEM.CNF into the main window. 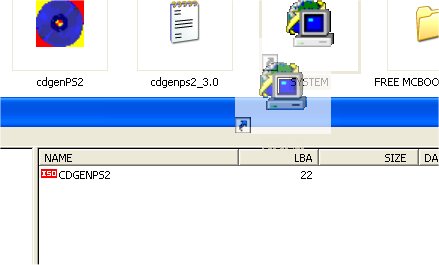 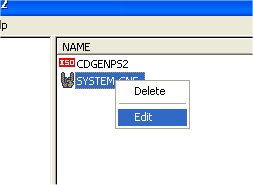
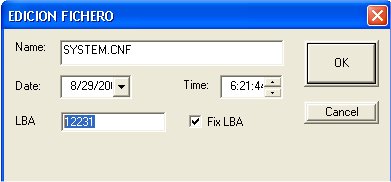 3-Drag the FREE_MCBOOT.ELF file into CDGenPS2. Then the folder INSTALL {Read the Install Guide to place files into the INSTALL folder first, if not using the Noobie Package.} You can click on the VOL button and change the name to FMCB Installer for future indentification of the disc, but this is optional and not required. Click on the IMG button from the left window and in the popup window give it a file name. Select the CDGenPS2v3 folder as the save location and choose the image file format .ISO or .BIN, then press the Save button. 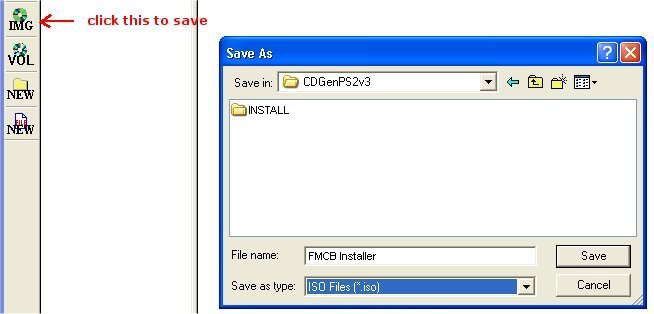 You can close CDGenPS2 now we are done with it. Burning your CD There are lots of burning apps that support both ISO and BIN extensions, so open your burn app and select the file you just made and burn it to a blank CDR. Just change the Write Speed to the middle setting of your burner app to ensure a good burn. If you dont have a burning app or never used it before, then heres a guide with a free burner you can use: BurnatOnce Now all you have to do now is get the disc to boot on the PS2, but you need a method to boot the disc since an unmodified PS2 will NOT boot this disc. Booting a burned disc Sony designed the console so it would not boot a burned disc as a preventive measure against piracy. But there are methods to use that will allow a burned disc to run on the console. Modchips SwapMagic retail discs A Memory Card Exploit thats has Cogswap Cheat discs such as AR Max or CodeBreaker A friend with any of the above This tutorial assumes you have one of these methods available, if not you must research the best method for you to use. This tutorial was written using the following methods. Created CD and saved as .iso format to use with UltraISO as my burn app. Burned with UltraISO to a CD-R TDK 700MB disc. Booted the disc with a CC 2.0 SLE on a NTSC V9 console. Installed Free McBoot on a Sony 8MB memory card {black one}. Tested the MC with an unmodded console {NTSC V4} and Free McBoot ran just fine. Note: Using FMCB after installation with a modchip may or may not work properly, as some chips need to be disabled. Example: The CC 2.0 SLE doesnt fully disable and will result in a screen , saying "No Menu" if you attempt to use Free McBoot . But you can still run FMCB button mapped apps on startups, by pressing the button assigned to an app. |